Wringr - Data Driven Tests
Wringr is a versatile and powerful platform that enables organizations to easily create and run data-driven tests. With its extensive range of features and capabilities, Wringr allows organizations to conduct tests with precision and accuracy, ensuring more reliable results.
The combination of a feature file along with code allows software to be more easily tested by non-technical users.
1. Example of a Generated Feature File
Here is an example of a BDD (Behavior Driven Development) feature file generated by Wringr for automated testing with Playwright and Cucumber:
Feature: Playwright site
Scenario Outline: Session
Given I navigate to the page "https:\/\/www.google.com"
When I enter "<value_2>" into the element "textarea[title='Search']; [role='combobox']; textarea[name='q']; textarea[id='APjFqb']; [aria-label='Search']; xpath=//textarea[contains(@role, 'combobox')]; xpath=//textarea[@title='Search']; xpath=//textarea[@id='APjFqb']; xpath=//textarea[@name='q']; xpath=//textarea[@aria-label='Search']; xpath=None; xpath=/html/body[1]/div[1]/div[3]/form[1]/div[1]/div[1]/div[1]/div[1]/div[2]/textarea[1]"
When I click on the element "text='SAP'" "text='SAP'; xpath=//em[contains(text(), 'SAP')]; xpath=None; xpath=/html/body[1]/div[5]/div[1]/div[13]/div[1]/div[2]/div[2]/div[1]/div[1]/div[1]/div[1]/div[1]/div[2]/div[1]/span[1]/em[1]"
Then I should see the text "<value_to_verify>"
Examples:
| value_2   | value_to_verify   |
| Sap23\n     | Sap               |
|  sap24\n    | Sap               |
|  sap25\n    | Sap               |
Scenario Outline
This defines a template for testing different inputs and expected outcomes.
- Given: Specifies the starting point, in this case, navigating to Google's homepage.
- When: Describes the actions to be performed, such as entering text into the search bar and clicking on a search result.
- Then: Verifies the expected outcome, ensuring that the correct text is displayed.
- Examples Table: Lists different sets of inputs and expected results to be tested.
Using Wringr, you can generate similar feature files to automate your testing process, ensuring thorough and accurate validation of your application's functionality.
2. How to Add Values to a Verify Step in Wringr
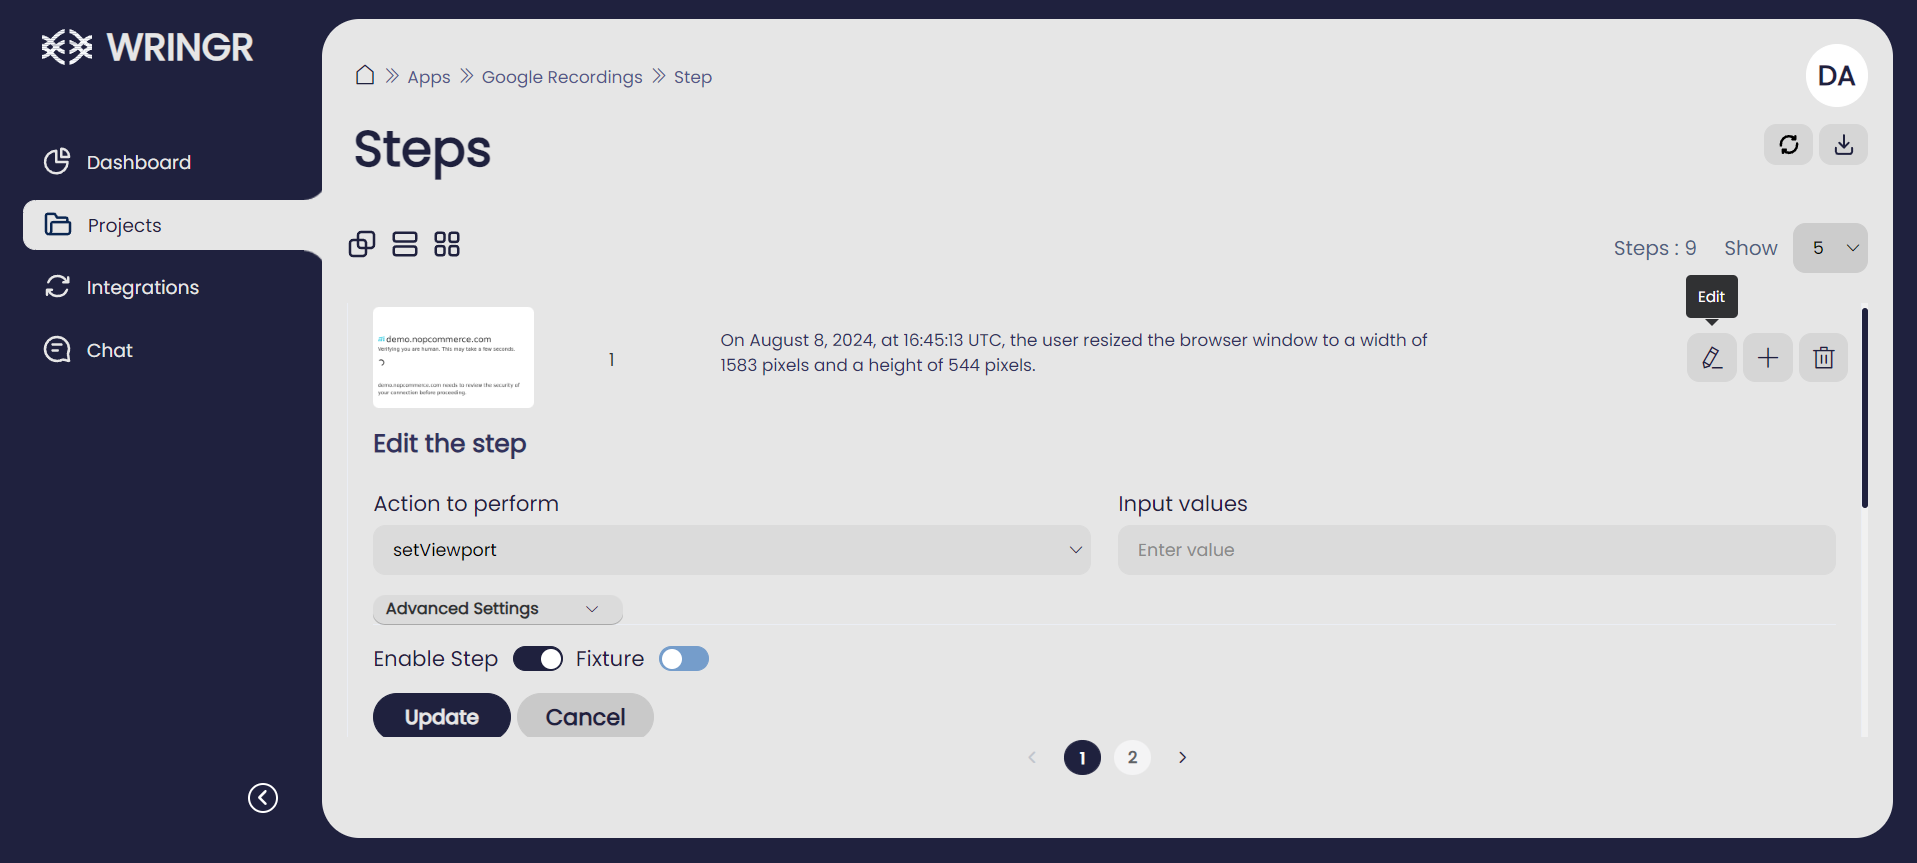
To add values to a verify step in Wringr, follow these steps:
Find the Verify Step
- Look for the step labeled verify in the list of steps.
- Click the pencil icon next to the verify step to edit it.
Add Input Values
- In the Edit the step panel, find the Input values field.
- Enter the desired values into the Input values field. For example:
Sap,sap3,sa4.
Save Your Changes
- Click the Update button to save your changes.
3. How to Download and Extract the Cucumber File in Wringr
To download and extract the Cucumber file in Wringr, follow these steps:
Navigate to Steps
- Go to the Projects section in the left navigation panel.
- Select the project you want to work on, such as "Denver".
- Click on the Steps section to view the list of steps for your project.
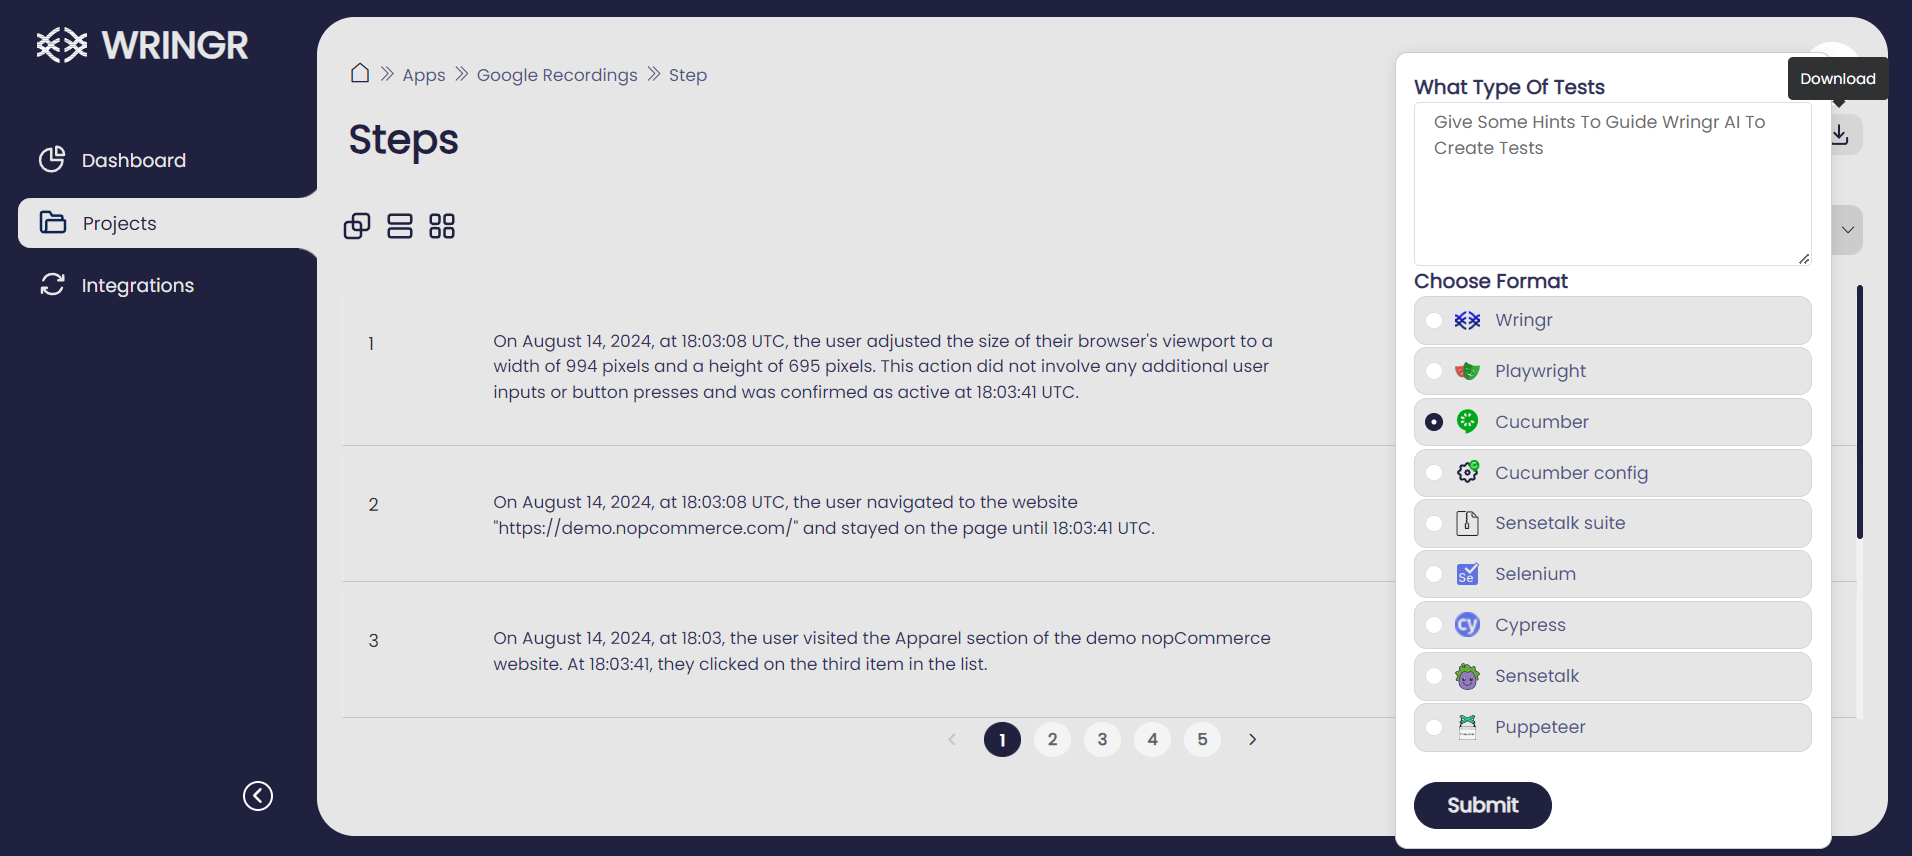
Download the Cucumber File
- On the right side of the Steps panel, you will see a series of icons.
- Locate the Cucumber icon (the third icon in the list) and click on it to download the Cucumber script file.
Extract the File
- Once the Cucumber file is downloaded, locate it on your computer.
- Right-click on the downloaded zip file and select "Extract All" to extract its contents to a folder.
Viewing Feature Details in the Cucumber File
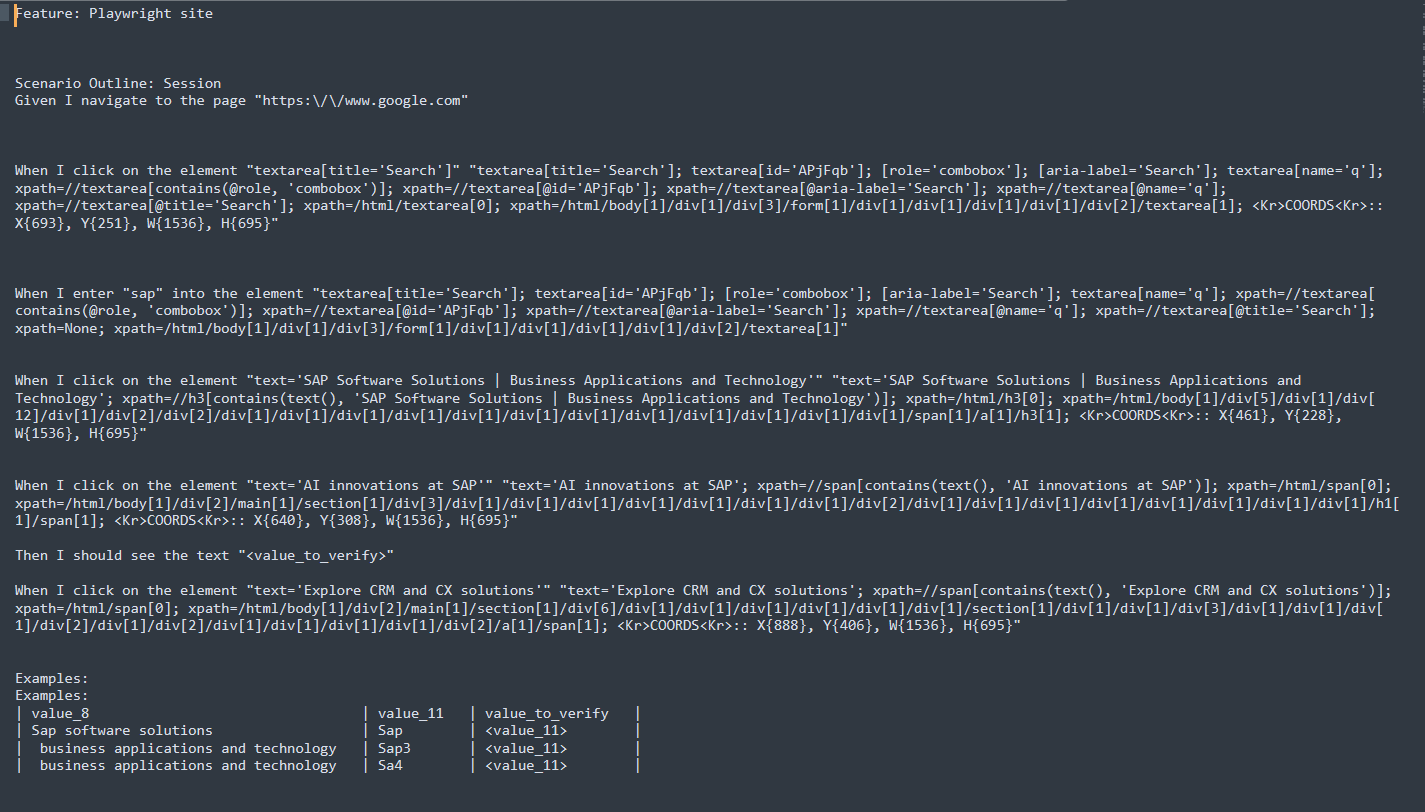
If you check the features in the Cucumber file, you will see detailed steps and scenarios. Here’s what you can expect to find:
Feature Definition
At the top of the file, you will see the feature name, such as "Playwright site".
Scenario Outline
The scenario outline defines the template for the tests. For example:
Scenario Outline: Session
Given I navigate to the page "https://www.google.com"
Step Definitions
Detailed steps for the scenario are provided. Each step includes actions like clicking on elements, entering text, and verifying results. For example:
When I click on the element "textarea[title='Search']"
When I enter "sap" into the element "textarea[title='Search']"
Example Table
The example table lists different sets of inputs and expected results for the tests. For example:
Examples:
| value_8                            | value_11 | value_to_verify |
| Sap software solutions             | Sap      | Sap             |
| business applications and technology | Sap    | <value_11>      |
By checking the Cucumber file, you can see all the details about the feature, including the steps and the data used for testing. This comprehensive view helps you understand how the tests are structured and what they aim to verify.
How to Install Dependencies and Run Tests in the Terminal
To install the necessary dependencies and run your tests, follow these steps:
Open Your Terminal
- Navigate to the directory where your project files are located.
Install Dependencies
- Run the following command to install all required dependencies:
npm install
Run the Tests
Once the dependencies are installed, execute the following command to run your tests:
npm test
By following these steps in your terminal, you will ensure that all dependencies are properly installed and that your tests are executed to validate the functionality of your application.
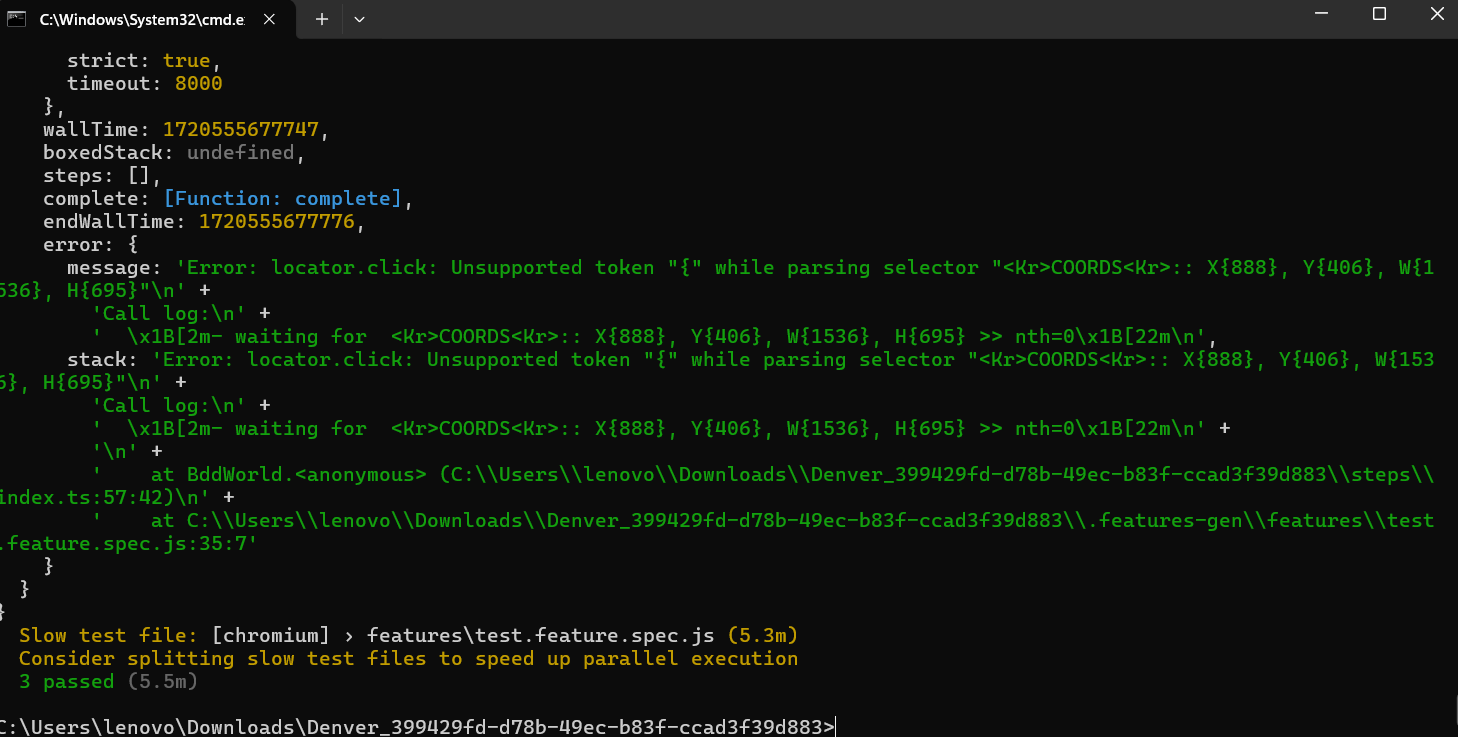
After running npm install and npm test in the terminal, follow these steps to review your test results:
Review Test Steps
- The test results will display a list of all the actions performed during the test.
- Each action, such as navigating to a page, entering text, or clicking an element, will be shown with detailed information.
Check Test Status
- Each step will have a status indicator:
- A green checkmark (✔) means the step passed.
- A red cross (✖) means the step failed.
View Additional Resources
- You can view additional resources such as screenshots, videos, and traces to further investigate any issues:
- screenshot: Provides a snapshot of the application at the point of failure.
- video: Offers a video recording of the entire test session.
- Download trace: Allows you to download a detailed trace of the test execution for further analysis.
Examples Table
- At the bottom, you will see an examples table that shows different sets of input values and expected results.
- Each row in the table will indicate whether the test passed or failed for those specific values.
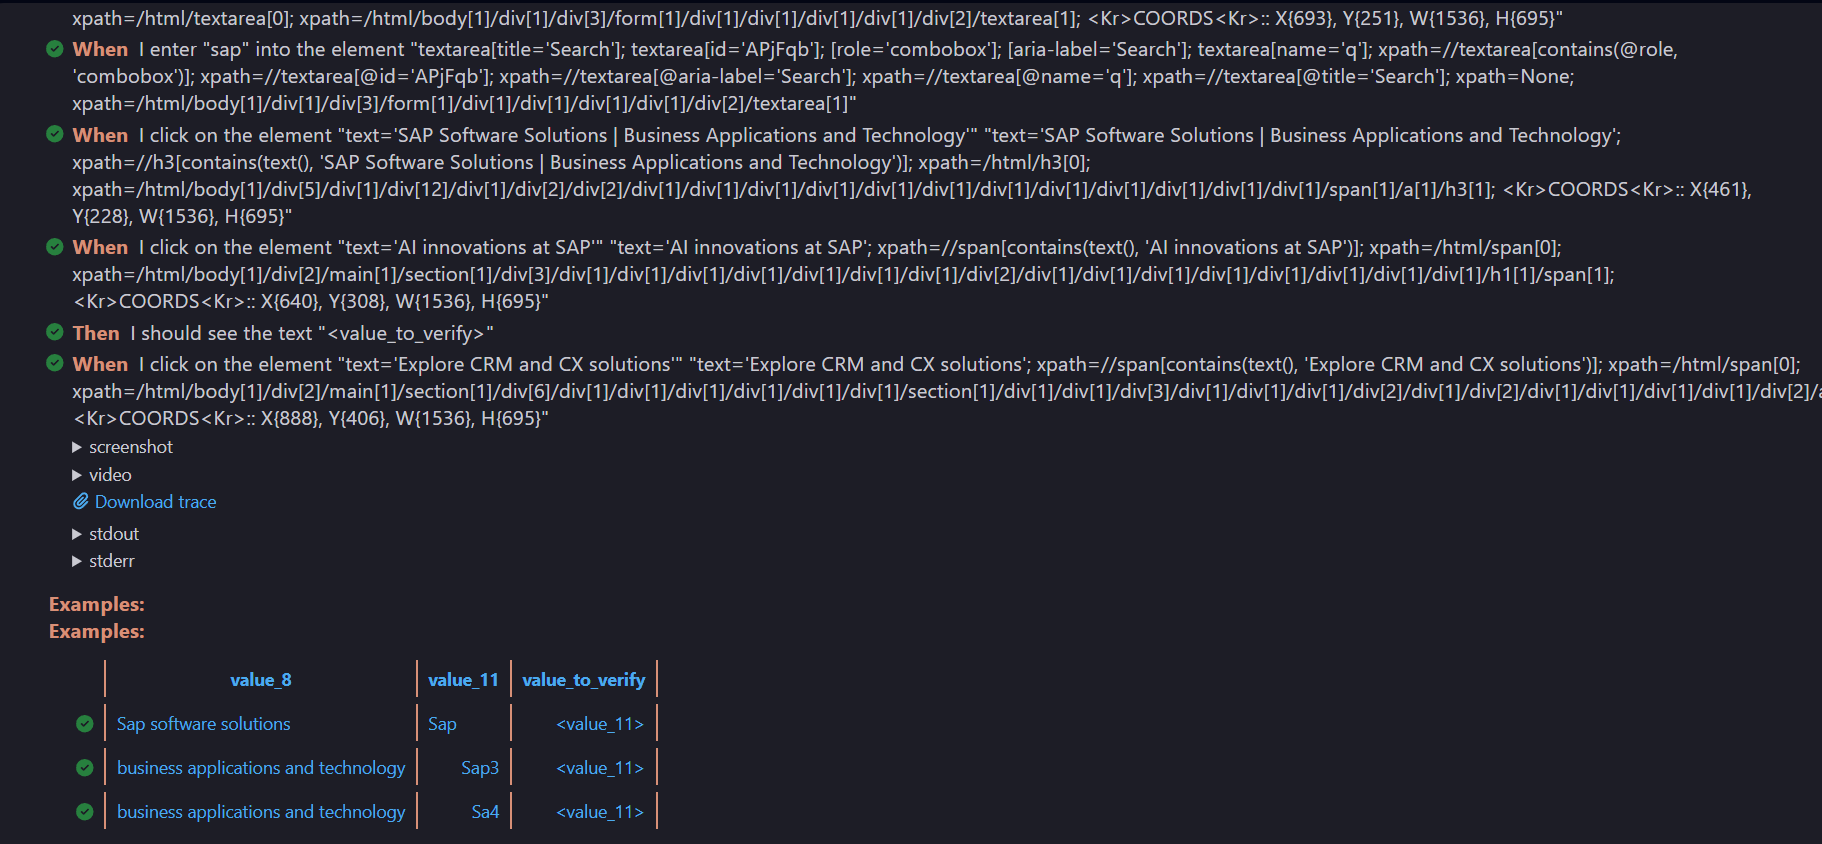
By following these steps, you can effectively review and understand your test results, ensuring your application is functioning as expected.